The short version
- A 65 lb pull neodymium channel magnet (3.25 × ½ × ¼ in) screws to the wall through its own two threaded holes — about $3.
- Two steel plates go on the back of the tablet or its case. The 3M adhesive is already on them — nothing extra to buy. About 56¢ a pair.
- A right-angle USB cable keeps the tablet on charge with the cable flat against the wall.
- Commercial tablet wall mounts run $30–$80. This is the same job for the price of a coffee.
Every wall-mounted tablet guide ends up at the same place: a bulky plastic cradle, four screws, a hole in the drywall, and a tablet you can't take down without a fight. I wanted the opposite — a tablet that lives on the wall as a smart home dashboard, stays charged, and lifts off the second I want it in my hand.
The answer turned out to be two magnets' worth of hardware and no bracket at all. Here's the whole build, what it costs, and the one measurement that matters.
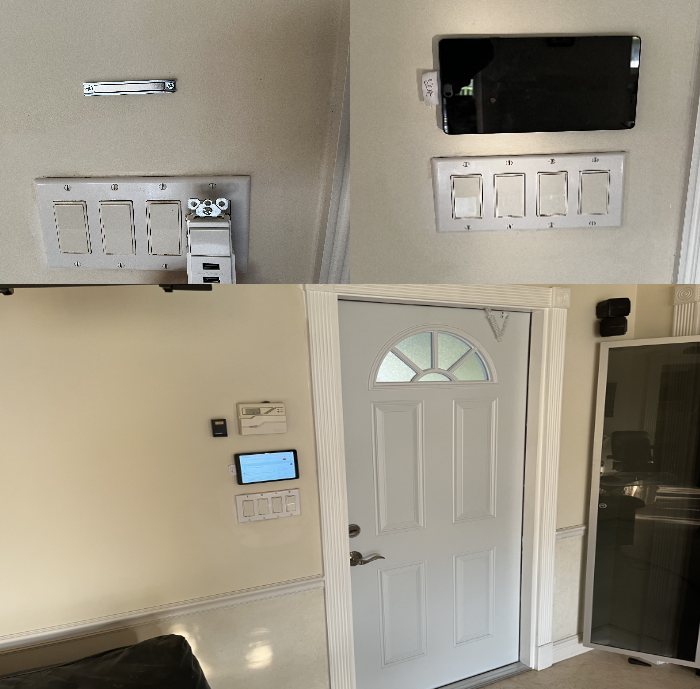
What it costs
Two numbers matter here. The mount itself is the cheap part — if you already have a tablet lying in a drawer, you're $5 away from a wall dashboard. The whole build, tablet and power included, is what a single commercial mount costs on its own.
The shopping list
-
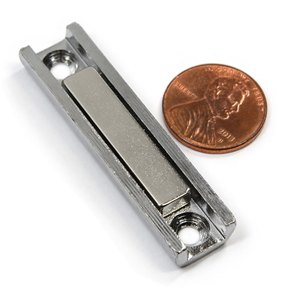 Neodymium channel magnet — 65 lb pull 3.25 × ½ × ¼ in
Goes on the wall. This one part does all the holding. The steel channel around it focuses the pull forward instead of letting it spill sideways.
-
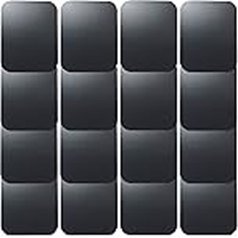 Steel adhesive plates — two per tablet adhesive already applied · buy the 16-pack
Peel and stick to the back of the tablet or its case — the 3M adhesive is already on them. The magnet grabs these. Two, not one, spaced apart so the tablet can't pivot.
-
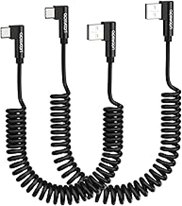 90° right-angle USB cable USB-C or Micro-USB, coiled
The part that makes it look built-in. The plug turns the instant it leaves the tablet, so the cable lies flat down the wall instead of jutting out.
-
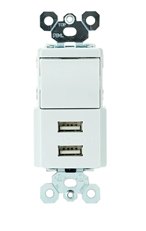 USB charging wall switch 2 USB ports + a working light switch
Optional, but it's what hides the power. Drops into the existing switch box, keeps the light switch working, and puts two USB ports right where the tablet hangs. No brick, no extension lead.
$22Buy the switch →eBay · Legrand 2× USB + switch
EU: Tuya USB + USB-C ↗ · AU: 2.1A wall plate ↗ -
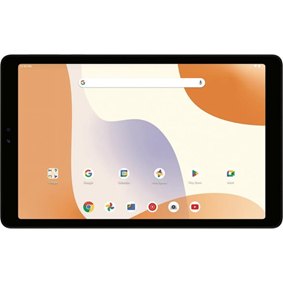 The tablet 8″ Android, refurbished
Any tablet works — this is just a cheap one that does the job. If you already have one in a drawer, the mount is the only thing you need to buy.
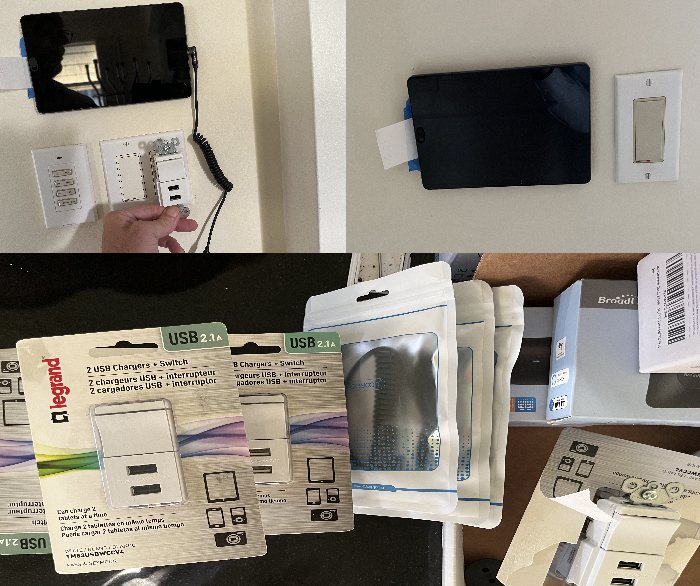
These are the exact parts in the photos. Nothing here is sponsored and there are no affiliate links — the buttons go straight to where each part was bought. Prices and listings drift, so treat the figures as a guide rather than a quote. Any equivalent part works; the only one worth matching closely is the magnet's 65 lb pull.
Buy in multipacks. The per-mount price above assumes the 6-pack of magnets and the 16-pack of plates. Buying one magnet on its own costs nearly as much as six. If you're mounting one tablet, you now have parts for five more — which is how this ends up on three walls.
Why 65 lb, and not stronger
This is the part worth getting right, and the only way to know was to buy four strengths and try them. I tested 25, 45, 65 and 80+ lb pull.
| Pull rating | How it actually behaves |
|---|---|
| 25 lb | Too weak. A heavier tablet slides down over a day, or lets go. |
| 45 lb | Holds a light tablet, creeps with anything bigger. |
| 65 lb | The sweet spot. Not hard to pull off, and it doesn't snap back violently when you put it on. |
| 80 lb+ | Two hands to remove. Going back on, it grabs so hard it slams — hard on the tablet and startling every time. |
Don't trust the number on the box. A pull rating is measured with bare steel in flat, full contact with the magnet. You have a plastic case in the gap and only two small plates touching — real holding force is a fraction of the rating. That's exactly why 65 lb feels right in the hand and 25 lb doesn't hold.
Why two plates and not one
One plate gives the tablet a pivot point: it hangs on, then slowly rotates. Two plates spaced apart spread the load across the magnet bar and lock the angle, so it stays level. Two plates is also what lets a bigger, heavier tablet work at all.
Building it
- Pick the spot — beside a light switch Hold the tablet against the wall and mark the top edge with a pencil. Next to a switch is the best place on any wall: the power is already in it, and that's where your hand already goes.
- Clean the back of the tablet Isopropyl alcohol on the back of the tablet or its case, then let it dry. The plates stick with their own adhesive, and nearly every adhesive failure is a surface that wasn't clean.
- Screw the magnet to the wall The channel magnet has two threaded holes — that is what they are for. Level it, mark the two holes, and screw it on with the magnet face outward. Into a stud is ideal; anywhere else, use a wall anchor. Two small holes, the same as hanging a picture.
- Peel and stick two steel plates on the tablet The adhesive is already on the back of them. Space them so both land on the magnet bar, and keep them away from the top edge of the tablet — more on that below.
- Run a right-angle cable A 90° USB connector turns the instant it leaves the tablet, so the cable runs flat down the wall instead of poking out. This is the single part that makes the mount look built-in rather than improvised.
- Hang it and test Snap it on and pull it off half a dozen times. If it sits crooked, peel one plate and move it — do this now while the adhesive is fresh.
Keeping it charged without killing the battery
A tablet that lives on the wall is plugged in permanently, and sitting at 100% all day every day is what wears a lithium battery out. Most tablets now have a battery saver or charge limit setting that stops at around 90% and holds there. Turn it on. It costs you nothing you'll notice and it's the difference between a dashboard that lasts years and one that puffs up in eighteen months.
For power, a USB charging wall switch is the tidy answer — it drops into the existing switch box, keeps the light switch working, and gives you two USB ports right where the tablet hangs. No visible brick, no extension lead.
See it on the wall
Questions people ask
Will magnets damage my tablet?
No. Tablets store everything on flash memory, which a magnet cannot erase — that worry comes from the days of spinning hard drives and magnetic tape. The battery and the screen don't care either.
Two real things can happen on some devices. The magnetometer — the compass — will read wrong while the tablet is sitting on a magnet, which only matters if you're using a compass or AR app. And a magnet near the top edge can trigger the sleep sensor that folio cases use, so the screen keeps dropping off. Both are solved the same way: move the steel plates lower on the back, away from the top edge.
How strong a magnet do I need?
65 lb pull. I tested 25, 45, 65 and 80+. Below 65 a decent-sized tablet creeps or drops; above it you need two hands to get the tablet off and it slams back on hard enough to make you wince. Remember the rated pull assumes bare steel in perfect contact — through a case and two small plates you're getting a fraction of it.
Does it work with a case on?
Yes, and the case is the better place for the plates — nothing is stuck to the tablet itself, and you can take the whole thing off the wall permanently by swapping the case. Put the plates on the outside of the case. A thick rugged case adds air gap and weakens the grip, so a slim case is friendlier to this.
Will it fall off the wall?
No. The magnet is screwed to the wall through its own threaded holes, so there is no adhesive to creep or let go over time — that is the usual failure mode of a stick-on mount, and it is designed out here. If you are not into a stud, use a wall anchor; a tablet weighs very little, but the screws are what make this a mount rather than a hopeful bit of tape.
Does it damage the wall?
Two screw holes — the same two a picture hook would make. What you do not get is a bracket, a cradle or a plastic frame sitting proud of the wall: the magnet is a slim bar, and with the tablet off there is almost nothing to look at. Take it down, fill two holes, done.
Will this work for an iPad?
Yes. The mount doesn't know or care what the tablet is — only what it weighs and where the steel plates sit. A full-size iPad is heavier than an 8″ Android tablet, so space the two plates wider apart, and keep well clear of the top edge where Apple's sleep magnets live.
What do you run on the tablet?
Anything. It's just a tablet on a wall — Home Assistant, Google Home, a camera feed, a calendar, or a remote-control dashboard. The mount is dashboard-agnostic, which is rather the point of it.
Mine runs READYWARE, which drives IR, RF, WiFi, network and Bluetooth gear from one screen. If you want to try the tooling without installing anything, the Signal Editor is free and runs in a browser tab.
The original build threads
This started as a few posts in the DIY and smart home communities. The comment threads are worth reading — people asked good questions and found uses I hadn't thought of.
- Hackaday.io — Tablet Magnet Wall Mount, low profile, under $5
The full project writeup with the parts list. - r/DIY — I built an on-wall magnetic tablet mount
- r/smarthome — On-wall magnetic tablet mount for $5
- r/googlehome — Always-on wall dashboard for my smart home
- r/hometheater — Always-charged AV control tablet
- r/ZigBee — Wall-mounted dashboard tablets that snap on and charge
What's running on the tablet
Mine runs READYWARE — a universal remote app that puts IR, RF, WiFi, Bluetooth and smart home devices on the same set of buttons, on the same screen. A wall tablet turns out to be a very good home for it: always on, always charged, always within reach of the room it controls. The mount works with whatever dashboard you prefer, but if you're wall-mounting a tablet to run your house, it's worth a look.
Free, no sign-up, runs in your browser
Two of the tools are free and need nothing installed — no account, no download. Open them and use them.
.ir/.sub, LIRC, Global Caché, BroadLink, ESPHome, Home Assistant SmartIR and more — 19+ formats in, 21+ out. Build a working remote from your brand with the wizards.
🚚
Signal Transporter
Move signals between hardware and formats without hand-editing a single hex blob. Point it at what you have, get out what your gear actually wants.
🎛️
Online Remote Builder
Lay out a remote in your browser — drag buttons, set colors and wallpapers — then load it onto the tablet on your wall. Easier than arranging anything on a small screen.
📱
The READYWARE app
Android, iOS and Android TV. IR, RF, WiFi, network, Bluetooth and smart home on one canvas. Your phone can even act as a Bluetooth keyboard and trackpad for a TV box or PC.